Exploring, experimenting & and sharing all things edTech to improve teaching and learning

Category: Extend MOOC

Teaching an Old Dog New Tricks…

#extendmOOC – Experimenter Module – ACTIVITY 3

The picture I chose for my feature image is one by  Sharon McCutcheon on Unsplash.

I chose it because it reminds us how much education has changed.  The box is old and reminiscent of a time when education was all paper and pencil and teachers were the purveyors of all information.  Now students can learn almost anything they want from the Internet.  Teachers and the education system have to change and evolve to make the learning experience better for all.

That’s what I love about the #extendmOOC Experimenter module.  We get to play around and try new things and ponder how we can apply them to our practice.  It’s fun, engaging and we can make mistakes (and learn from them).

Activity 1 – Reflection

The first activity asked us to try at least 3 Daily Extends. I tried more because I find them so fun.  I like them because they are quick (usually), I get to learn something new and sometimes I can utilize what I learn in my courses.

#oext1 challenged us to look around our home/office for an object that allows us to extend the capabilities of a task.

I chose three things that fit the bill for me.  Here’s my post on TwitterIMG_5068

@ontarioextend #experimenter module – #oext1 challenges us to share something that helps us extend…..my pic has 3 – my notebook keeps me on task, my technology keeps me connected to my students and my kitchen table gives me lots of room to expand! #ExtendmOOC

The second #extend I chose was #oext13.  For this one we had to Define Yourself in One or More Noun Project Icons.  We were to explore the Noun Project site for one or more icons that might represent you.

I had never heard of the noun project. It had some great images that I will go back to and incorporate into lessons and presentations.  By asking you to give credit to the source, it reminds faculty that just because it’s for education, doesn’t mean you don’t have to give credit (and it is also serves as an example to students when they see you giving credit). the following was my post:

noun 
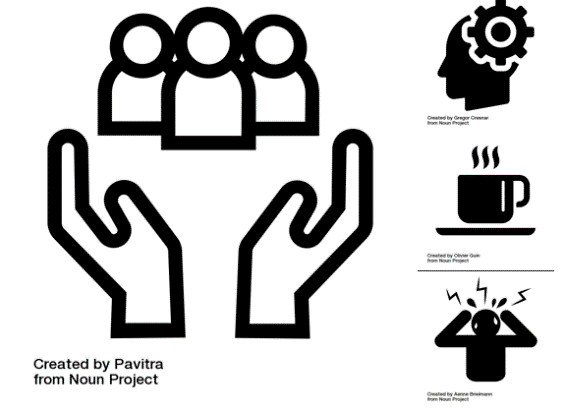
@ontarioextend #oext13 – I care about my students and am always thinking about new ways to reach and engage them. Because of this, I don’t get enough sleep and need my coffee to wake up every morning. All this can stress me out….just a bit…#extendmOOC

The third one I chose was #oext123. This daily activity brought in the curation and collaboration modules. We collaborated by curating a list of videos on how and why to use ed-tech tools. I actually did 2 posts for this one.

  1. I found a great video on one of my favourite tools (Socrative). My post on Twitter:

    @ontarioextend #oext123 This is one of my favourite tools. I have been using it for years for formative assessments. @rmbyrne does a great job doing a quick  verview of setting up a quiz. https://youtu.be/Cs7Cbu5QRhk  #extendmOOC

  2. I also shared a video by Dr. Ruben Puentedura that talks about the different levels of tech integration. My post on Twitter:

    @ontarioextend #oext123 challenges us to find videos on how/why to use various ed-tech tools. Once we have our tools, we need some help from @rubenrp to effectively integrate the tools https://youtu.be/ZQTx2UQQvbU  #extendmOOC

I had so much fun that I did a whole bunch more.  I also enjoyed seeing what other people posted. Sometimes they would find something I had never seen.  I learned through their posts too.

A few more Daily Extend Posts:

Activity 2 – Reflection

The next activity asked us to take a deep dive into one of a list of activities. In my post, I already did some reflection on why I chose this activity and what I thought about it.

I chose the following activity: “Peruse  The Agora Project Challenge Bank  and complete one of the challenges.”.  .

I looked at the various categories that were listed. Since this is an Open MOOC, I decided to choose the “Openness” category.

I found the following Activity: “Collect Activity Across Social Media With Tagboard” (http://udg.theagoraonline.net/bank/assignments/tagboard)

What is Tagboard?

Tagboard is a really useful tool for finding tweets about various topics (based on the hashtag you use).  It allows you to see tweets in a more visual way that looks almost like a Padlet wall.

Our school is taking a deeper look into Micro-credentials, so I decided to make a tagboard that would find any reference to micro-credentials on Twitter using the hashtag #microcredentials. There were some very interesting posts that I will be exploring further. Link:  https://tagboard.com/microcredentials/480738

Also related to Micro-credentials are Digital badges, so decided to create a second tagboard using the hashtag #digitalbadges (https://tagboard.com/digitalbadges/480739)

Last week, I was in an online workshop on digital badges and they were talking about how using digital badges to show skills is important in bridging the gap between what employers are looking for and the skills candidates have.

This was one of my favourites posts and it confirms what they said in the workshop:
tweet

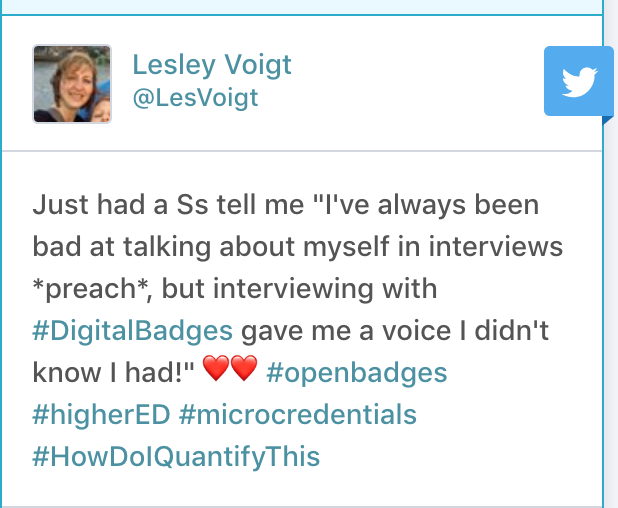
This tool allowed me to quickly search posts about specific topics. In this case, it lead me to articles and people who are interested in the topic.

This is an awesome tool that I plan to use from now on!

Overall, I think this may be one of my favourite modules. I’ve never been afraid to try new things when it comes to technology.  I like to bring the students along for the ride and get their input.   Sometimes we (teachers) think we know what a student will like or find intuitive.  It’s important to get them involved in the process. I find that when they are, those are the activities that are embraced by the students the most.

Digital Literacy in Teaching & Learning

I really liked the definition and diagram that I found in JISC Guide to Developing Digital Literacies .

“Digital literacies are those capabilities which fit an individual for living, learning and working in a digital society.” 

I liked how they broke digital literacy into 7 elements.

If you look both the diagram and the definition, we are still looking for some of the same skills that we always have, only now we focus on the utilization of technology to achieve the task.   For example, one element: “Communications and collaboration. Participate in digital networks for learning and research”.  Just because we have technology available to better communicate/collaborate, doesn’t mean we didn’t expect students to be able to communicate before technology was around. Technology has changed the way we communicate and hence, students need to be able to communicate this way.  Collaboration once meant that students would have to get together physically in order to collaborate on projects. Now they can do it all virtually and don’t even have to be in the same time zone.

As teachers, we can help our students to become more digitally literate by demonstrating effective technology use and/or incorporating it into our assignments.  E.g. Utilizing a simulation to enhance understanding and application of subject material.  The All Aboard: Digital Skills in Higher Education resource listed some specific examples of what can be utilized.  For example, under “Teach and Learn”, things like simulations, digital badges, lecture capture etc. are listed.

Quite often, when we hear the words “digital literacy”, we think of knowing how to use a computer.  Too often we assume that because students are “digital natives” that it also means they know how to utilize digital tools effectively.  I have found that most of the times this is not the case.

Anyone? Bueller?

I chose Patch Four: Check, check 1-2 – Checking with Students by Mary Overholt (https://facultypatchbook.wordpress.com/2017/05/09/patch-four-check-check-1-2/ ). Specifically, I chose the following quote:

How many times have you, as a teacher, stood at the front of the classroom and asked: “any questions?” And how many of those times have you been met with blank stares, and silence? Have you, like me, resorted to a “Ferris Bueller” reference: “Anyone…? Anyone…? Bueller…? Bueller…?” only to be met, yet again, with blank stares from the much-younger-than-you-even-think-they-are, born in the post-Bueller era, students in the room?

This nugget resonated with me because I know if I ask my students, “any questions”, most of the time, I will get the same response that the teacher in Ferris Bueller’s Day Off did; blank stares. Sometimes, just to see who’s actually listening, I’ve said the exact thing from the movie: ”Anyone…? Anyone…? Bueller…?” and I get laughter (and the occasional student who has never seen the movie).  At the very least, it gets students smiling.

I learned a long time ago that I needed other ways to check how students were doing.  For many of them, asking if there are any questions scares them and they stay silent rather than speak.  They think they are the “only one” that doesn’t understand.

A number of years ago, I received a grant as part of the HP Catalyst Initiative for a Math project that I proposed.  We received 50 touchscreen PC computers and some money to utilize them in my Business Math classes.  Each student had a laptop to use in the class and my notes were broadcast out to each device. They saw everything I wrote on their devices as I wrote it.  They could add their own notes and save all of it. Two of the best features were the “stop light” and the ability for students to work on a question and ‘send’ it back to me.

black traffic light

Photo by Davis Sanchez on Pexels.com

The stop light was simple. With a press of a button, I could ask the students if they understood the material (Green), were somewhat confused (yellow) or they didn’t understand (Red).  It was quick and no one else knew what they answered except me.  There was one instance where ½ of them didn’t understand the material. When I mentioned this, all of a sudden, hands went up. Realizing that they were not the only one confused gave students the confidence to ask questions.  We reviewed the material and were able to move on and not leave anyone behind.

The other feature allowed me to push out a question to the students, and the students could answer it and send it back to me. Since this was a math question and they had touch screen devices with pens, they could write their answers just like they would on a piece of paper. This gave me the ability to see in detail what they were thinking when answering questions and I could address any issues through feedback that I could write on their submission and send back to them.  I could also choose a solution that was correct and display it for the whole class (without a name).

When I moved to a classroom that did not have these devices, I had to find new ways to accomplish the same thing.  I turned to Socrative to help me get quick feedback on how students were doing.  Most students download the app which makes it quick and easy to use. At the beginning of each class, I give students a quick poll with some questions that are based on the lesson from the previous class.  I take up the questions they have issues with before moving on. I can see who is having trouble and can use that information to give more individual help as well.

mokup smartphone technology phone

Photo by freestocks.org on Pexels.com

I would like to find another tool that would allow me to see their process when solving problems. Since most, if not all, students have a smart phone, I was considering using something like Flipgrid to get them to video themselves solving a problem. Another one I’d like to try is goformative.

I will have to do some testing to see what works and get feedback from the students on what they liked.  I find involving the students in the decision adds to the buy in.  That’s how I settled on Socrative. We tried a few things and they told me they liked Socrative the best.

Every class I would hear “are we doing a Socrative today miss?” There’s nothing better than having students look forward to doing math!!

Learning Math is Like Driving a Car…

This is post is my submission for the Ontario Extend MOOC Activity: Like Driving a Car

Many concepts I teach build on other concepts learned at the beginning of the course, or on concepts that should have been learned in grade school or high school.  Because so many students come with a variety of backgrounds, we find we have to teach concepts such as Order of Operations, exponents and fractions.

There are many examples I could use. But I am working on one example in my Business Math 2 course that demonstrates this point.

Students have been working with the compound interest formula

To work with the formula, the need to understand

Screenshot 2019-02-04 20.15.22

  • What each operation/symbol means
  • Order of operations
  • Exponents
  • How to use the exponent button in their calculator

We are now moving on to finding i

In order to isolate i in the equation, they need to

  • be able to apply algebraic skills to rearrange the formula.
  • know how to take the nth root (and that this is how they can get rid of the exponent)
  • understand that they need to do the correct operations in the right order

This is just one concept that depends on understanding previously learned material.

I believe that many students struggle in math because they don’t understand the basics.  Applying this to more complicated problems is very difficult if they don’t have the foundation they need.

Misunderstood Math

This post is in response to the Extend Ontario Activity Misunderstood.  The challenge was to “Identify a concept that is often misunderstood in your discipline. Can you think of an analogy that can help make the concept make sense to students?”

Just today I was reviewing a test with a student. Throughout the test, it was obvious that he had issues with integers, especially when combining positive/negative numbers & the distributive property.


When teaching the distributive property, I often use the “Smarties Activity” (or in the US, it’s called the M&M Activity).  Instead of using x and y, the different coloured smarties allow students to visualize like terms.

It works well, and the students enjoy it, whether they use smarties or coloured markers.  The original M&M Activity I found did not have a reference on it, but I have searched and I believe the original activity came from this website: Modeling the Distributive Property  As fun and engaging as this activity is, it doesn’t address negative numbers.  Even though students understand multiplying positive/negative numbers, they seem to have troubles when applying the distributive property when there are negative numbers involved.

Now that I identified a concept students struggle with, the task was to come up with an analogy to help students understand it. I decided to first look around on the web.  Why re-invent the wheel if some bright person has already done it?

It didn’t take long to find one that would work for my students. This post by Josh Rappaport titled: Using Analogies when teaching math shared a scenario that worked well for explaining the concept.  Basically, the parenthesis ( ) represent a box that you are going to use to move your “items”.

Your items (the terms)are packed inside the box.  The sign in front of the bracket identifies the type of moving company. Specifically:

+ (    )     The + sign means you’ve hired a GOOD moving company

– (    )     This – sign means that you’ve hired a BAD moving company

A good moving company packs your items properly and they come out the way they went in.  A bad moving company does a poor job packing your items and they come out broken.  The items come out the EXACT OPPOSITE of what they should be.  In math, to represent “the opposite of” means we change the sign to the opposite of what it was. i.e. “+” becomes a “-” and similarly, a “-” becomes a “+”.

The site goes on to provide examples as well as practice questions.  For more details, check out Josh’s post Using Analogies when teaching math.

I would extend this concept by adding numbers in front of the brackets to represent the number of boxes there are and have students tell me how many items are unpacked at the end.  I would start with positive numbers (thus, reinforcing the distributive property) and then add in the negative numbers to extend on the analogy use above.

I am teaching this course in the Fall and look forward to trying this out with my students.

This post is in response to the Misunderstood Extend Activity in the Teacher for Learning Module of OntarioExtend.


“Syllabus Concept Map” Activity

One of the extend activities on the Ontario Extend website is called Syllabus Concept Map.  This activity asked us to create a concept map of our course.  Since I will be teaching a new course in the Fall (new to me at least), I thought this course would be a good  one to use for the activity.  It also gives me an opportunity to get the big picture of what I will be teaching the students.

I chose to use MindMeister to create a map of the course.  The free version allows you to make up to 3 maps.  You can download them into a MindMeister file, but the free version does not allow you to save as a PDF or JPG.  So I used a tool I just learned about today on Steven Secord’s response to another Ontario Extend Activity called “A Tiny Tech Tale”.  The tool is called Gyazo and it allowed me to take a screenshot of my MindMap so I could share it here.  It also allows you to make short animated gif screenshots.

Here’s the map that I came up with based on the course outcomes and the topics for each unit.

mindmap of 1020

Math1020

This was a great exercise that allowed me to review the entire course and get a good understanding of what the students will be learning in this course.  I can see how concept maps would be great tools for helping students organize their learning and review for tests

This activity was completed for the Ontario Extend Activity in the Teaching for Learning Module.

Powered by WordPress & Theme by Anders Norén

css.php